For most of us, data streams through our pipelines like a rushing river, feeding our analytical dashboards with real-time insights and keeping us on the pulse of ever-changing trends. But what happens when the river takes a detour, leaving a dry bed of historical data waiting to be ingested? That’s where batch ingestion comes in, and when it comes to wrangling big batches for your Apache Druid data warehouse, harnessing the power of Apache Airflow is key.
This guide is your map to navigating the confluence of Airflow and Druid for smooth batch ingestion. We’ll get you started by showing you how to setup Airflow and the Druid Provider and use it to ingest some data into Druid. Forget clunky one-off scripts and manual interventions – we’ll have you building reusable, reliable batch pipelines in no time.
So, whether you’re dealing with periodic data dumps, historic backfills, or simply want a robust fallback for when the streaming spigot runs dry, join us on this journey through the art of batch ingestion with Airflow and Druid. Get ready to conquer those data backlog mountains and unleash the full potential of your Druid system.
The Druid provider for Airflow recently added hooks for MSQ ingestion. At the time of writing there were a few issues to iron out – we’ll get these figured out and update the article accordingly
Setup Apache Airflow
Airflow can be configured using several methods including:
Managed Airflow with AWS MWAA (Amazon Managed Workflows for Apache Airflow)
mkdir airflow; cd airflow# Download the docker-compose.yamlcurl -LfO 'https://airflow.apache.org/docs/apache-airflow/2.8.0/docker-compose.yaml'# configure the required directories - these directories are mounted in the # container to /opt/airflow (e.g. /opt/airflow/dags)mkdir -p ./dags ./logs ./plugins ./config# Configure the UID environment variableecho -e "AIRFLOW_UID=$(id -u)" > .env# Initialise the Airflow containersdocker compose up airflow-init# Start Airflowdocker compose up
Once started we can view the components of the stack:
$ docker psCONTAINER ID IMAGE COMMAND CREATED STATUS PORTS NAMES61f101c356cb apache/airflow:2.8.0 "/usr/bin/dumb-init ..." About a minute ago Up About a minute (healthy) 0.0.0.0:8079->8080/tcp airflowdockerkb-airflow-webserver-1bbce357e5ba2 apache/airflow:2.8.0 "/usr/bin/dumb-init ..." 3 minutes ago Up 2 minutes (healthy) 8080/tcp airflowdockerkb-airflow-worker-127c90befac17 apache/airflow:2.8.0 "/usr/bin/dumb-init ..." 3 minutes ago Up 2 minutes (healthy) 8080/tcp airflowdockerkb-airflow-triggerer-1e6f6be7fe9a9 apache/airflow:2.8.0 "/usr/bin/dumb-init ..." 3 minutes ago Up 2 minutes (healthy) 8080/tcp airflowdockerkb-airflow-scheduler-10c7fd9fab729 postgres:13 "docker-entrypoint.s..." 3 minutes ago Up 3 minutes (healthy) 5432/tcp airflowdockerkb-postgres-1dbd5db020d9a redis:latest "docker-entrypoint.s..." 3 minutes ago Up 3 minutes (healthy) 6379/tcp airflowdockerkb-redis-1
Check for the Druid Provider
Now that our Airflow stack is running in Docker, we can connect to Airflow to understand if our required provider (apache-airflow-providers-apache-druid) is included.
Alternatively we can connect to the Airflow container and check which providers are available using the airflow providers list command.
In the default distribution the Druid provider will not be included – we need to proceed to the next step.
Adding Druid Provider For Docker Environments
In order to install the Druid provider in our Docker environment, we need to update the docker-compose.yaml before starting (or restarting) our Docker environment.
To do this, stop any running docker-compose environments and update _PIP_ADDITIONAL_REQUIREMENTS in the docker-compose.yaml like:
When setting up a new connection, it can help to have the Test Connections functionality enabled. We can do this by adding a line to our docker-compose.yaml – we can add this directly after the _PIP_ADDITIONAL_REQUIREMENTS line:
AIRFLOW__CORE__TEST_CONNECTION:'Enabled'
Add a Druid connection
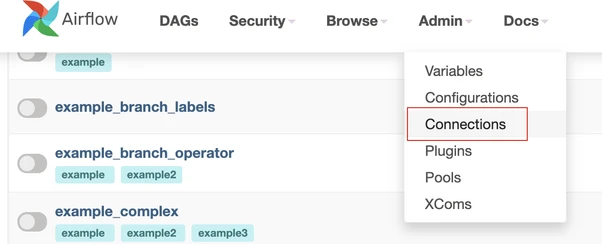
Navigate to the Connections section of Admin to add a conneciton
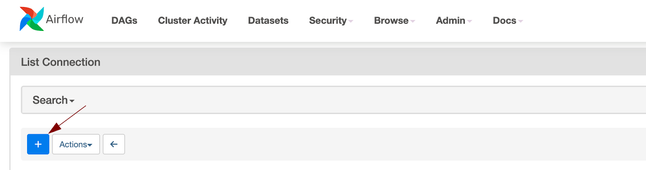
From here can click + add a new connection
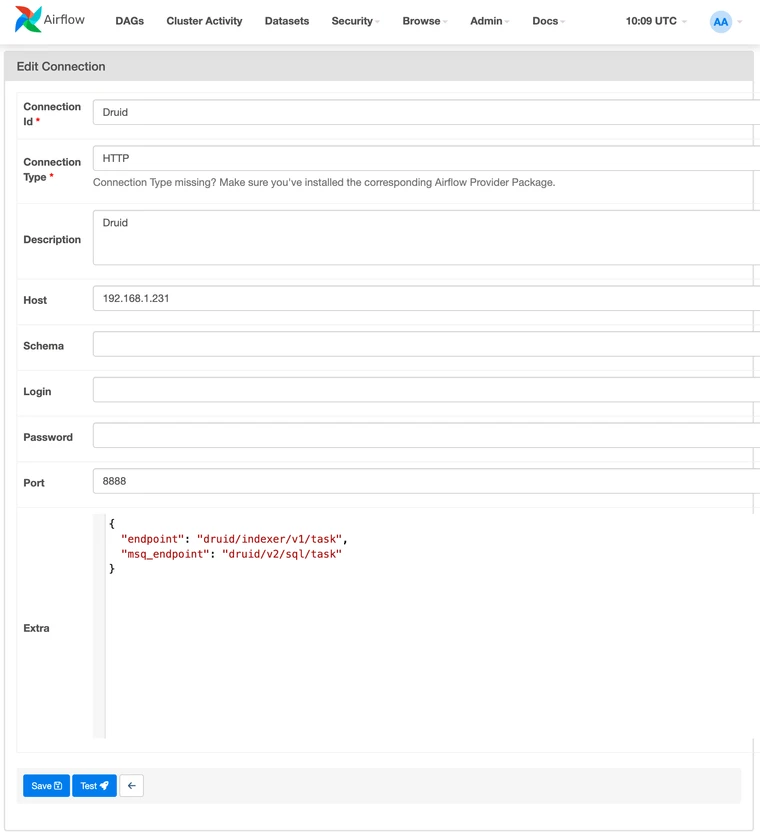
Populate the dialog with the properties of your Druid cluster.
Important point: the Connection Type needs to be HTTP (not Druid)
In order to configure a scheduled ingestion into Druid using Airflow, we will need to provide:
A Druid native or SQL ingestion spec. We can parameterize this ingestion spec so that it can be run repeatably, Airflow can handle the population of the parameters accordingly
A DAG to execute the ingestion process – this is how we tell Airflow how to run the job, and any parameters to change at execution time
Parameterizing an ingestion spec
Ideally only a few items in a batch ingestion spec should require parameterization for execution in Airflow. These may include entries such as directory prefixes, URIs or baseDirs, or the interval startTime / endTime.
These parameters use Jinja templating, with parameters being specified in {{ }} and parameters including params. before their names like params.prefixes
Parameterizing our prefixes allows us to add code in our DAG to account for schemes which use subfolders to separate our source data.
Parameterizing our startTime and endTime allows us to add code in our DAG to manage ingestion timelines. We can daily, hourly, every 15 minutes – calculating start/end time is outside the scope of this doc.
Ingestion specs in this example are expected to be placed in the plugins directory.
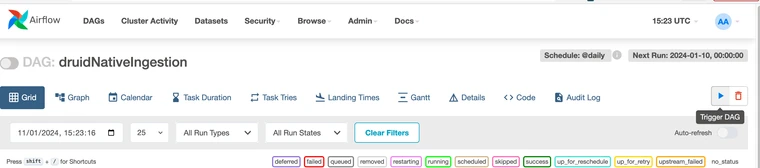
Once our ingestion spec is placed in plugins and our DAG is placed in dags we should find our DAG available to run in Airflow
Troubleshooting
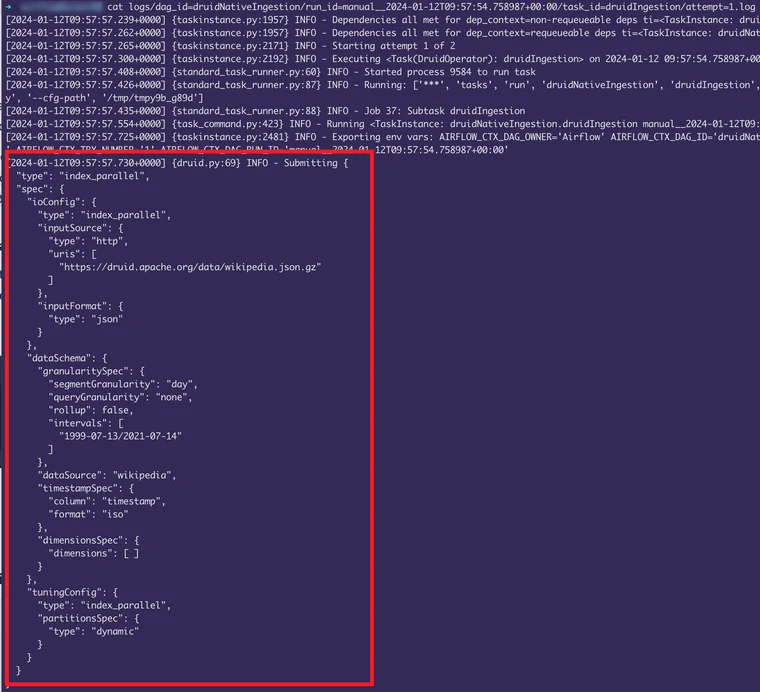
In addition to the details available in the UI, it can be helpful to have a look at the logs to understand how the DAG is being passed to Druid.
Logs can be found in the logs directory – for example a log from a run of the above spec and dag was found in logs/dag_id=druidNativeIngestion/run_id=manual__2024-01-12T09:57:54.758987+00:00/task_id=druidIngestion/attempt=1.log
Are the parameters are being interpreted properly / is our spec valid
We might want to grab the ingestion spec from the log details and try it in Druid directly to ensure it is a valid spec. Copy the spec from the log, and paste in the Task tab of Druid
Other blogs you might find interesting
No records found...
Jun 16, 2025
10 Years of Imply: From Apache Druid to What’s Next in Real-Time Analytics
We’ve officially hit double digits! Ten years ago, a few Druid-obsessed engineers asked a radical question: What if analytics didn’t have to be slow, stale, or stuck in dashboards? Back then, we were just...
Real-Time Observability Without Operational Overhead: What’s Next?
Observability is meant to provide clarity, speed, and confidence in modern systems. Yet for many organizations, it has become a source of complexity, cost, and operational drag. Managing pipelines, tuning...
It’s Time to Rethink Observability: The Event-Driven Future
Observability has evolved. Forward-looking teams are already moving beyond static dashboards and fragmented telemetry—treating all observability data as events and unlocking real-time insights across their...