Introduction
Apache Druid is a game-changer for real-time analytics. Its purpose-built architecture enables fast data ingestion, storage, and retrieval for analytical queries. Druid is one of the only products in the analytics database domain that features automatic schema discovery. This offers an unparalleled ability to adapt to diverse and ever-evolving data sources, removing the necessity for tedious manual schema definition and maintenance. This feature empowers users to focus on data analysis and insights rather than spending time and effort on managing and updating schemas.
In this blog post, we will set up a schema-less ingestion that allows for changes to the data to be automatically detected. We will also create messages, publish those topics to Kafka and ingest the messages into Druid. We will cover everything from setting up your Druid environment to ingesting streaming messages from Kafka to handle real-time data.
Automatic Schema Discovery in Druid
Auto schema detection is especially helpful for analytical databases for several reasons, including the following:
Flexibility: Analytical databases often deal with diverse and evolving data sources. With auto schema detection, the database can automatically adapt to different data structures and handle schema changes without requiring manual intervention from a DBA. This is particularly helpful for frequently changing, event-driven streaming data. The additional flexibility allows for efficient and agile data exploration and analysis.
Time-saving: Manually defining and maintaining schemas for every data source can be a time-consuming and error-prone process. Auto schema detection automates this task, saving time and effort for database administrators and data engineers.
Scalability: Analytical databases typically handle large volumes of data. Auto schema detection allows the database to handle varying data sizes and structures seamlessly. As new data sources are added or existing ones evolve, the database can dynamically adjust its schema detection capabilities, ensuring scalability without compromising performance.
Ease of use: Auto schema detection simplifies the onboarding process for new data sources. Instead of requiring users to define the schema upfront, the database can automatically infer the structure and make the data available for analysis. This improves the usability of the analytical database and reduces the barrier to entry for users.
Data quality assurance: Auto schema detection can also help identify potential data quality issues. By analyzing the structure and patterns of the data, the database can highlight inconsistencies or anomalies that may require further investigation or cleansing. This ensures data accuracy and enhances the reliability of analytical insights.
Overall, auto schema detection in an analytical database streamlines the data ingestion process, accommodates diverse data sources, improves data exploration capabilities, and supports scalability in handling large volumes of data.
Prerequisites
To begin, you will need to install and configure Apache Druid on your local machine or server. Then install Kafka locally, write a Kafka producer to send messages, and set up the ingestion configuration in Druid to enable auto-schema detection.
Install Druid Locally
- Download the latest Druid release from apache.org and extract the file.
- From the terminal, change directories to the distribution directory, for example:
cd druid_26/distribution/target/apache-druid-27.0.0-SNAPSHOT
- From the apache-druid-26.0.0 package root, run the following command to start the micro-quickstart configuration:
./bin/start-druid
- This starts up instances of ZooKeeper and the Druid services
- After the Druid services finish startup, open the web UI at http://localhost:8888.
Note: To stop Druid at any time, use CTRL+C in the terminal. This exits the start script and terminates all Druid processes.
Install Kafka
Apache Kafka is a high-throughput message bus that works well with Druid.
1. Download the latest version of Kafka, using commands similar to the ones below (based on the Kafka version) in your terminal:
curl -O https://archive.apache.org/dist/kafka/2.7.0/kafka_2.13-2.7.0.tgz
2. Unzip the .tgz file:
tar -xzf kafka_2.13-2.7.0.tgz
3. Go to the Kafka directory
cd to the location of the kafka_2.13-2.7.0 folder
4. In the Kafka root directory, run this command to start a Kafka broker:
./bin/kafka-server-start.sh config/server.properties
Note: To stop Kafka at any time, use CTRL+C in the terminal. This exits the start script and terminates all Kafka processes.
Create topic
Execute the command below from a terminal window to create a topic called test_topic.
./bin/kafka-topics.sh –create –topic test_topic –bootstrap-server localhost:9092
Create a Kafka Producer
Define a Kafka producer to create and send messages to Kafka (see code sample below).
import json
from datetime import datetime
from confluent_kafka import Producer

def simple_message(val):
 	now = datetime.now().isoformat()
 	msg = f'This is message number {val} from Kafka created at {now}'

 	data = {
 	"message": msg,
 	"timestamp": now,
 	#Uncomment line below to add a new field to the message
 	#"new_field": f'message_id_{val}'
 	}

 	return json.dumps(data)

def send_simple_messages(i, producer, topic):
 	msg = simple_message(i)
 	print(msg)
 	producer.produce(topic, value=msg)
 	producer.flush(30)

def run_producer():
 	producer = Producer({'bootstrap.servers': 'localhost:9092'})
 	topic = 'test_topic'
 	print(f'The following messages will be sent to the topic: {topic}')

 	try:
        for i in range(1, 21):
      	send_simple_messages(i, producer, topic)
 	except KeyboardInterrupt:
 	pass

 	producer.flush(30)

if __name__ == "__main__":
 	run_producer()
The code above initializes a Kafka producer to send messages to a specified Kafka topic. The run_producer function sets up the Kafka producer with the bootstrap server configured to localhost:9092 and the topic set to test_topic, using a loop to generate the specified number of messages.
The send_simple_messages function constructs and sends individual messages. Each message is generated by the simple_message function, which creates a dictionary containing a custom message with the current timestamp and a unique identifier and the new_field, if that code line is uncommented. This dictionary is then converted to a JSON-formatted string which is sent to the Kafka topic via the producer. After sending each message, the producer is flushed prior to the termination of the script.
Creating a Streaming Data Source
Real-time data processing is critical for many applications today, making Apache Druid an indispensable tool for the smooth ingestion and analysis of streaming data due to its seamless integration with Kafka.
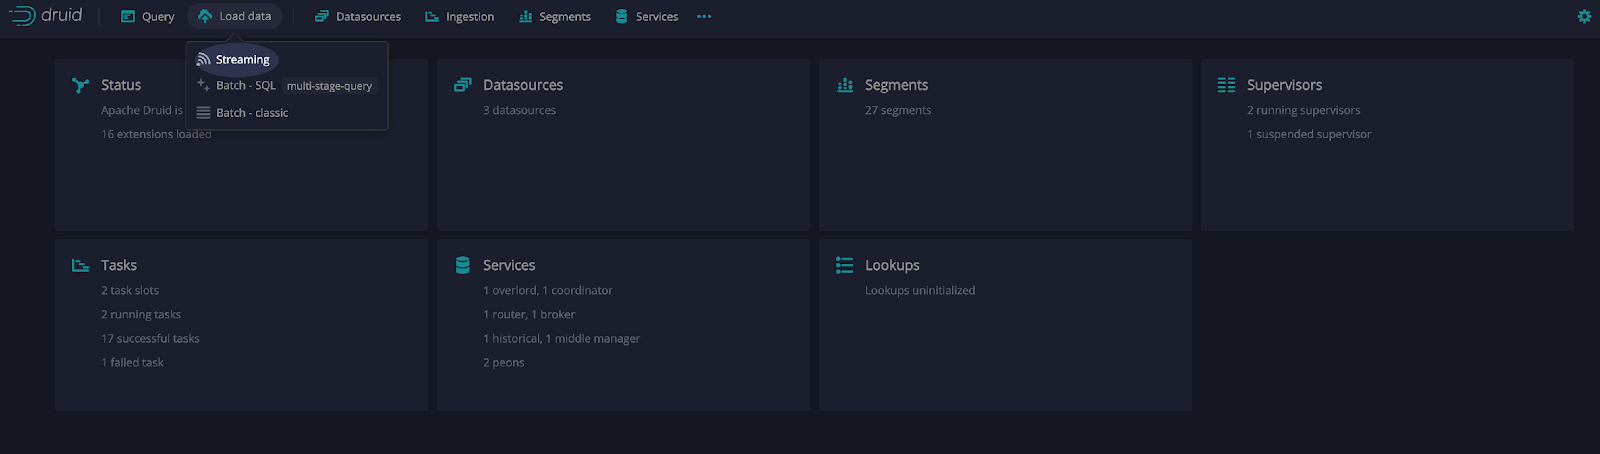
Let’s create a job to load data from the Druid UI. From the home page, select Load data and then Streaming (see example below).
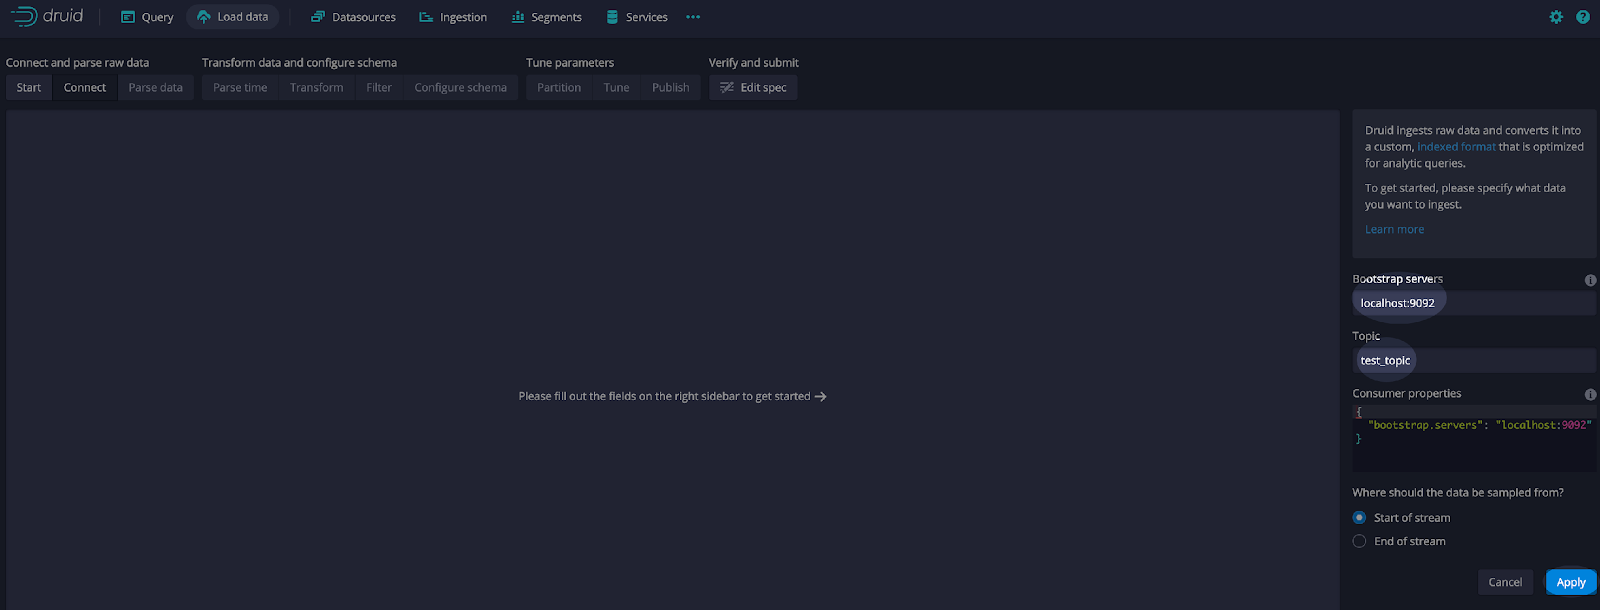
Next, select Apache Kafka and Connect data (see example below).

Add the bootstrap server for the Kafka broker. Since we are running Kafka locally, the server is localhost:9092.
Add the topic name that we created earlier, test_topic.
Select Apply (see example below).
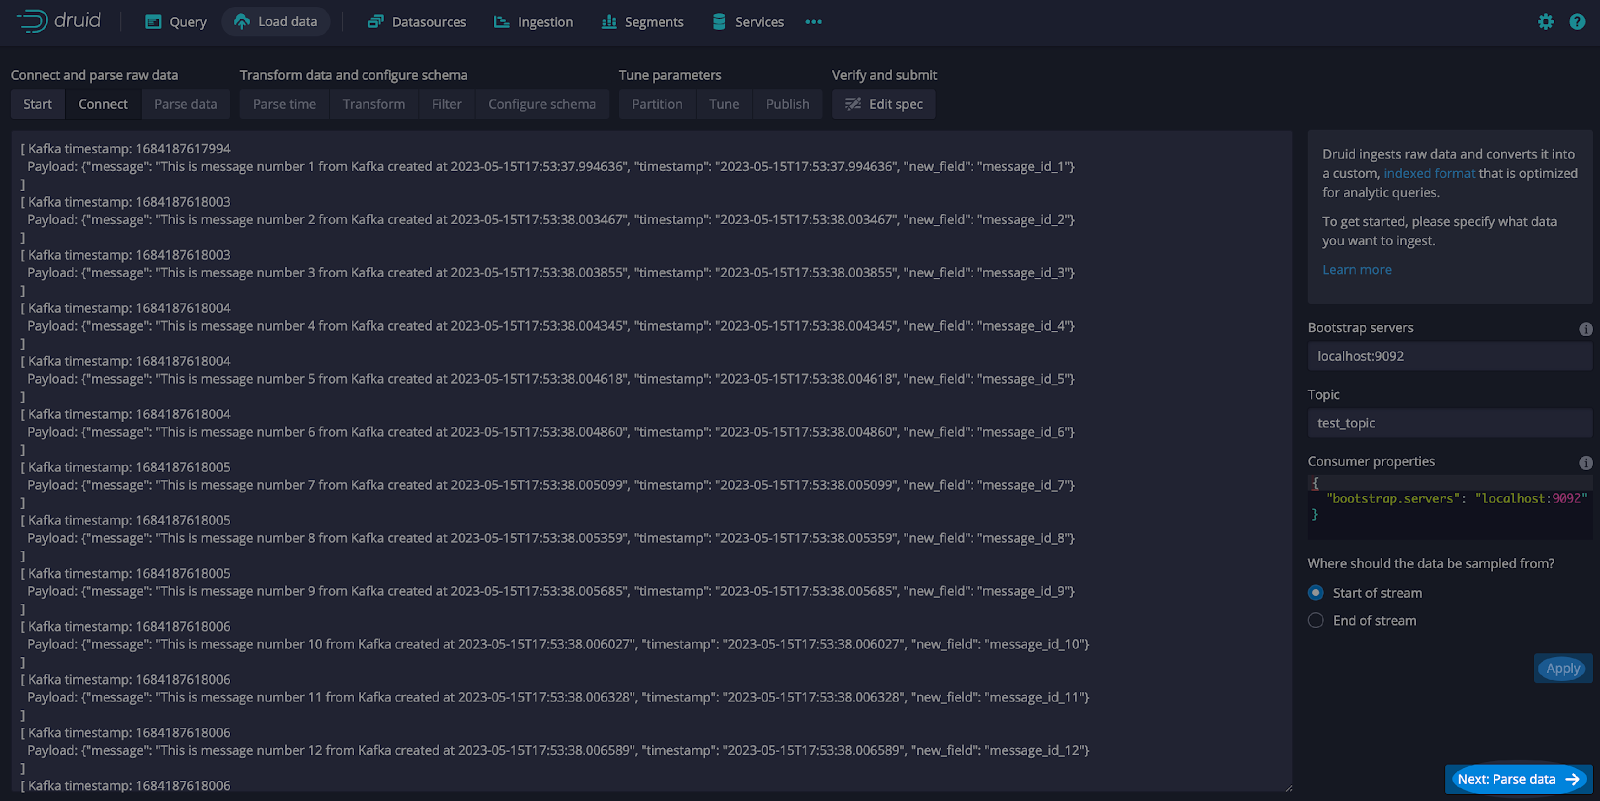
Ensure that Kafka is started and execute the code shown earlier to generate and send messages. The messages will be shown in the connect UI.
Here is a detailed look at a few messages (see screen print below) including the Kafka timestamp which represents the time elapsed since the Unix epoch. Defined as 00:00:00 Coordinated Universal Time (UTC) on January 1, 1970. It is a common way to represent time in many computer systems.
From this screen select Apply and Next: Parse data.
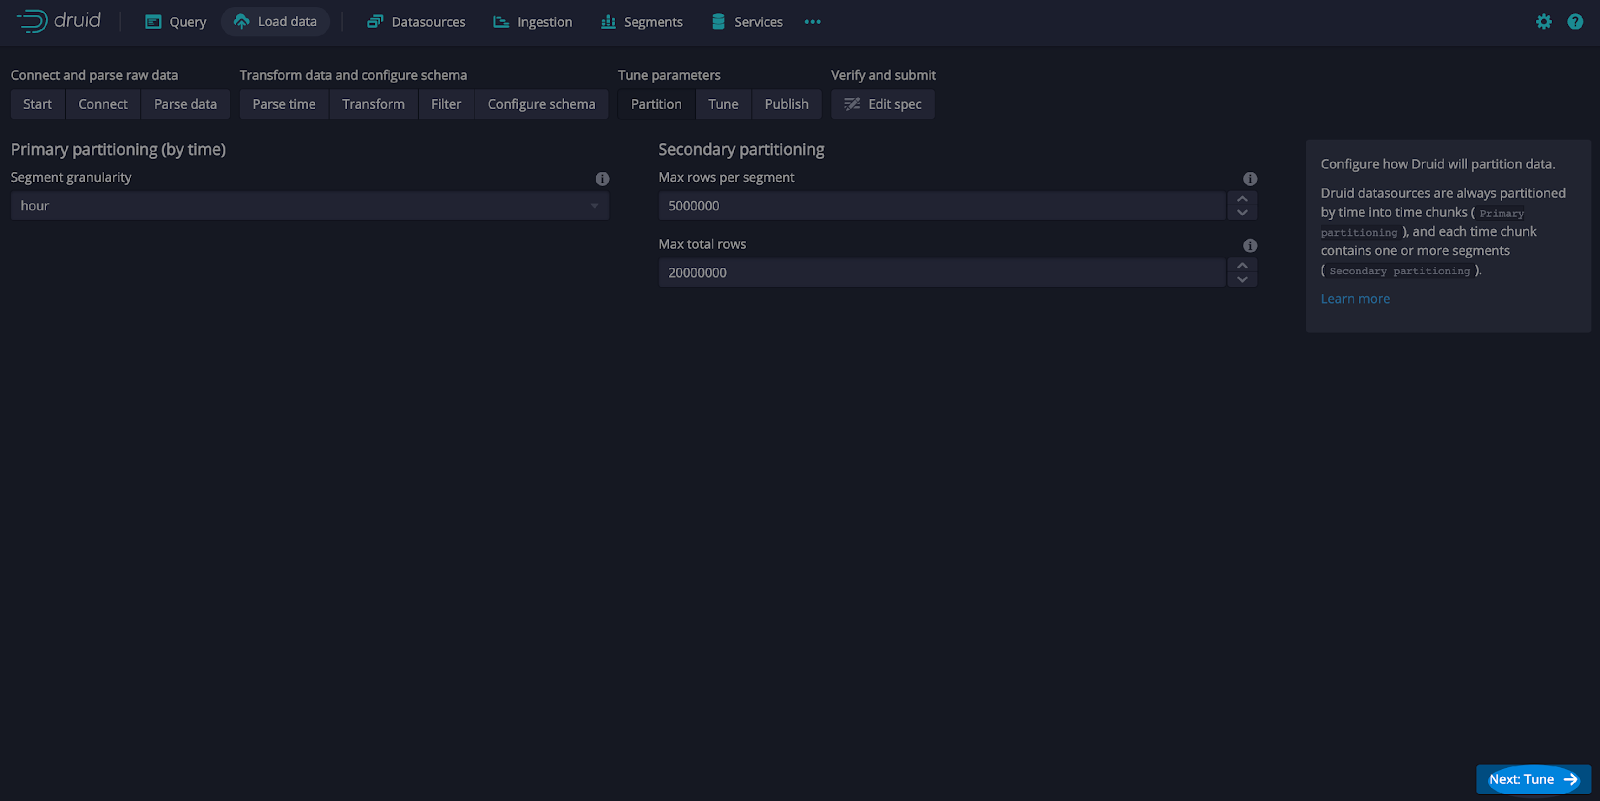
Leave the defaults and select Next: Parse time. Also, leave the defaults and select Next: Transform, Next: Filter, Next: Configure schema, and Next: Partition. On the Partition screen, select hour as the Segment granularity (see screen print below).
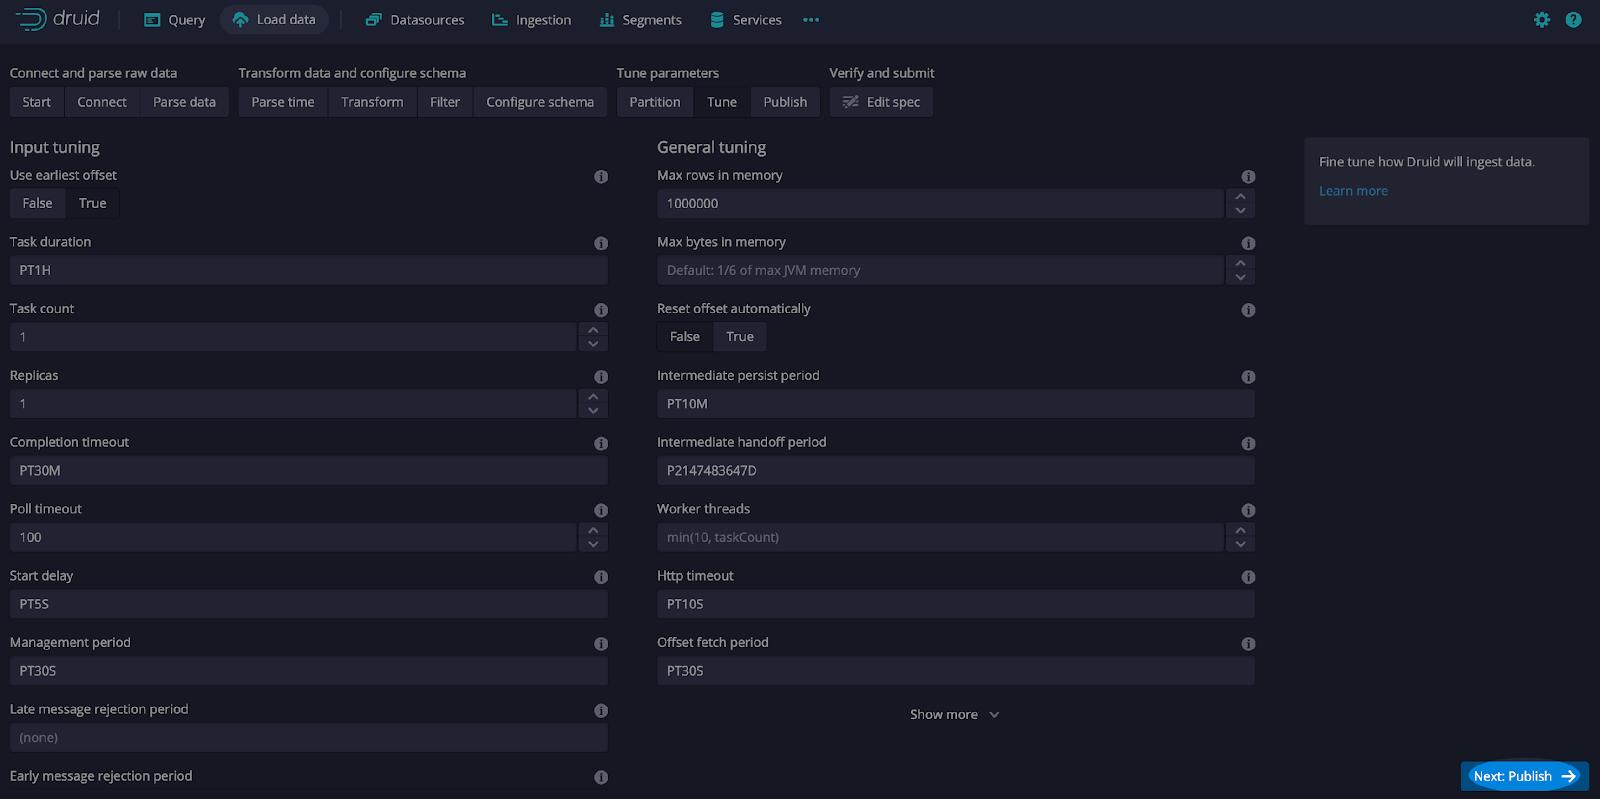
On the Tune screen, select Use earliest offset as True and Next: Publish (see screen print below).
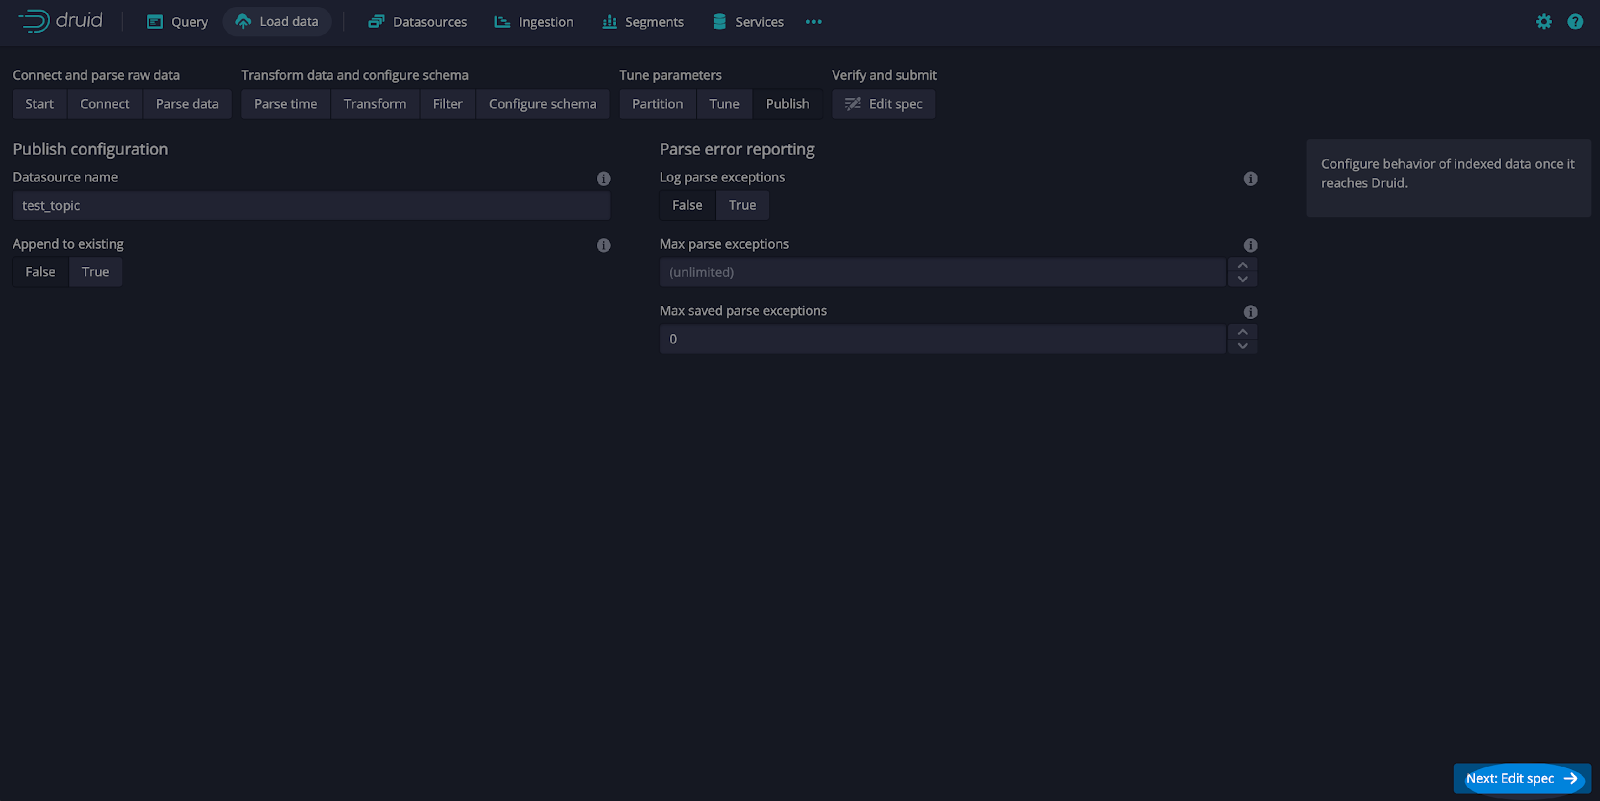
Leave the defaults and select Next: Edit spec.
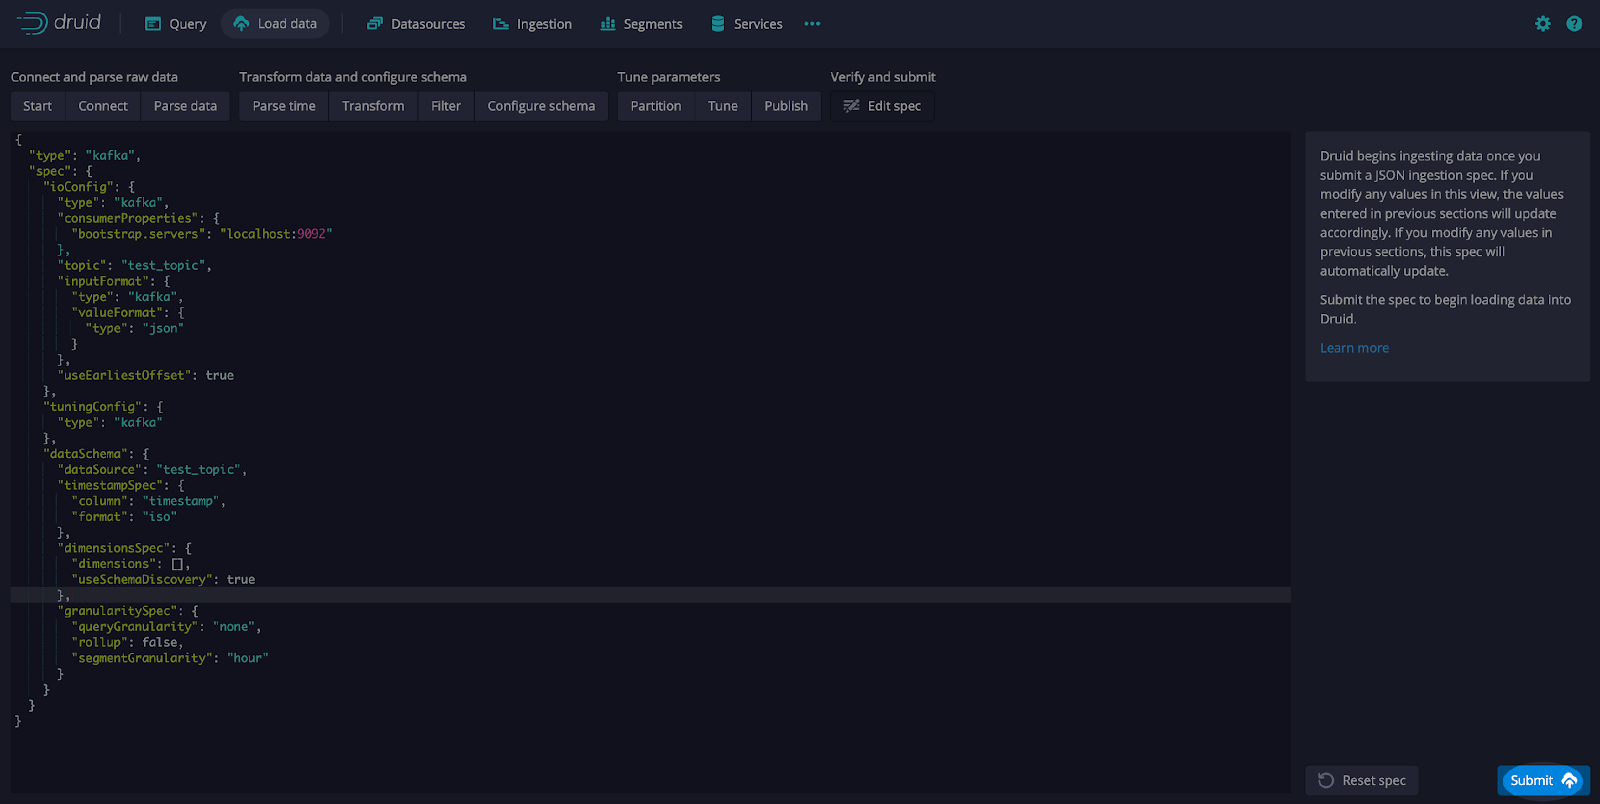
On the Edit spec screen modify the configuration dimensijonsSpec using the JSON below:
“dimensionsSpec”: {
“dimensions”: [],
“useSchemaDiscovery”: true
},
Here is a sample configuration specifications:
{
  "type": "kafka",
  "spec": {
    "ioConfig": {
      "type": "kafka",
      "consumerProperties": {
        "bootstrap.servers": "localhost:9092"
      },
      "topic": "test",
      "inputFormat": {
        "type": "kafka",
        "keyFormat": {
          "type": "regex",
          "pattern": "([\\s\\S]*)",
          "columns": [
            "line"
          ]
        },
        "valueFormat": {
          "type": "json"
        }
      },
      "useEarliestOffset": true
    },
    "tuningConfig": {
      "type": "kafka"
    },
    "dataSchema": {
      "dataSource": "test",
      "timestampSpec": {
        "column": "timestamp",
        "format": "iso"
      },
      "dimensionsSpec": {
        "dimensions": [],
        "useSchemaDiscovery": true
      },
      "granularitySpec": {
        "queryGranularity": "none",
        "rollup": false,
        "segmentGranularity": "hour"
      }
    }
  }
}
Note that the dimensionsSpec is the section where you would typically add the data types, just has a dimensions array [] and useSchemaDiscovery set to true.
After editing the specification, select Submit (see screen print below).
Now that the ingestion job has been set and the data source has been configured, we will adjust the Kafka message by adding a field. Uncomment the highlighted line of code from the Python code shown above:
"new_field": f'message_id_{val}'Rerun the code to create and send messages to Kafka. Then access the Query UI from the Druid console and execute this query:
SELECT *
FROM test_topic
ORDER BY "__time"
DESC
LIMIT 50
Notice that in the query results, the new_field that we added to the JSON message sent by the Kafka producer is included without any need to modify the ingestion spec and adding a schema (see screen print below).

Summary
In this article, we went through a comprehensive guide on installing Druid and Kafka, defining a streaming data source, and setting up an ingestion job. We also adjusted the messages published by Kafka to include an additional field. This allowed us to demonstrate Druid’s automatic schema discovery using a real-world scenario where the data set changes are seamlessly managed, eliminating the need for human intervention.
This innovative feature empowers users with unprecedented flexibility, allowing the environment to evolve with diverse data sources without the arduous task of manual schema definition or maintenance. In practical terms, this liberates users to concentrate more on tasks like interpreting data and gleaning valuable insights instead of being consumed by administrative duties. This is fantastic news for anyone interested in real-time data analysis. The ability to make sense of real-time data with agility and accuracy opens up new possibilities for transforming raw data into actionable insights.
For additional information on Apache Druid schema auto-discovery, please visit Introducing Schema Auto-Discovery in Apache Druid.
About the Author
Rick Jacobs is a Senior Technical Product Marketing Manager at Imply. His varied background includes experience at IBM, Cloudera, and Couchbase. He has over 20 years of technology experience garnered from serving in development, consulting, data science, sales engineering, and other roles. He holds several academic degrees including an MS in Computational Science from George Mason University. When not working on technology, Rick is trying to learn Spanish and pursuing his dream of becoming a beach bum.
 Architecture
 Deployment
 Ingestion
 Modeling
 Operations
 Development


