In this guide, we will walk you through creating a very simple web app that shows a different embedded chart for each user selected from a drop-down. While this example is simple it highlights the possibilities of how you can use Pivot’s new embedding features.
In this example, we can imagine that the drop-down represents the currently logged-in user on your site. When the user logs in we fetch the signed link from the /embed endpoint and serve it in an iframe. For illustration purposes we will get a new link every time the user state is updated, however, it is only necessary to fetch a link when the user first logs in as it will be valid for the specific logged-in user until the configured time to live (TTL) or until the user logs out or clears their cookies.
Set up
Let’s start by getting some setup out of the way. First, let’s use create-react-app to create a basic React app using typescript with a dependency on BlueprintJS, which we will use as our component library
npx create-react-app polaris-embedding-example --template typescript
cd polaris-embedding-example

npm install --save @blueprintjs/core
npm start
After running npm start, you will see it is hosted at localhost:3000.
Create a new source file called UsersMenu.tsx – this is the component that allows us to simulate switching between users.
src/UsersMenu.tsx
import '@blueprintjs/core/lib/css/blueprint.css';
import { Button, Menu, MenuItem, Popover } from "@blueprintjs/core";

export interface User {
  userName: string;
  cubeAccessFilter?: string;
  linkAccessFilter?: string;
}

interface UserMenuProps {
  userId: number;
  onUserIdChange: (user: number) => void;
}

export const USERS = [
  { userName: "User 1" },
  { userName: "User 2" },
  { userName: "User 3" },
];

function UsersMenu({ onUserIdChange, userId }: UserMenuProps) {
  const usersMenuItems = USERS.map((user, i) => (
    <MenuItem
      key={user.userName}
      text={user.userName}
      onClick={() => onUserIdChange(i)}
    />
  ));
  return (
    <Popover content={<Menu>{usersMenuItems}</Menu>}>
      <Button
        alignText="left"
        icon="user"
        rightIcon="caret-down"
        text={USERS[userId].userName}
      />
    </Popover>
  );
}

export default UsersMenu;
In App.tsx let’s add an iframe for the embedded visualization, our UsersMenu for switching users, and component state for storing the current user and the embed link URL.
src/App.tsx
import { useState } from "react";
import "./App.css";
import UsersMenu from "./UsersMenu";

function App() {
  const [link, setLink] = useState("");
  const [userId, setUserId] = useState(0);

  return (
    <div className="App">
      <iframe
        width="100%"
        height={700}
        src={link}
        title="Embedded visualization"
      />
      <div>
        <UsersMenu onUserIdChange={setUserId} userId={userId} />
      </div>
    </div>
  );
}

export default App;
We should now have a blank iframe and a menu of users to choose from.
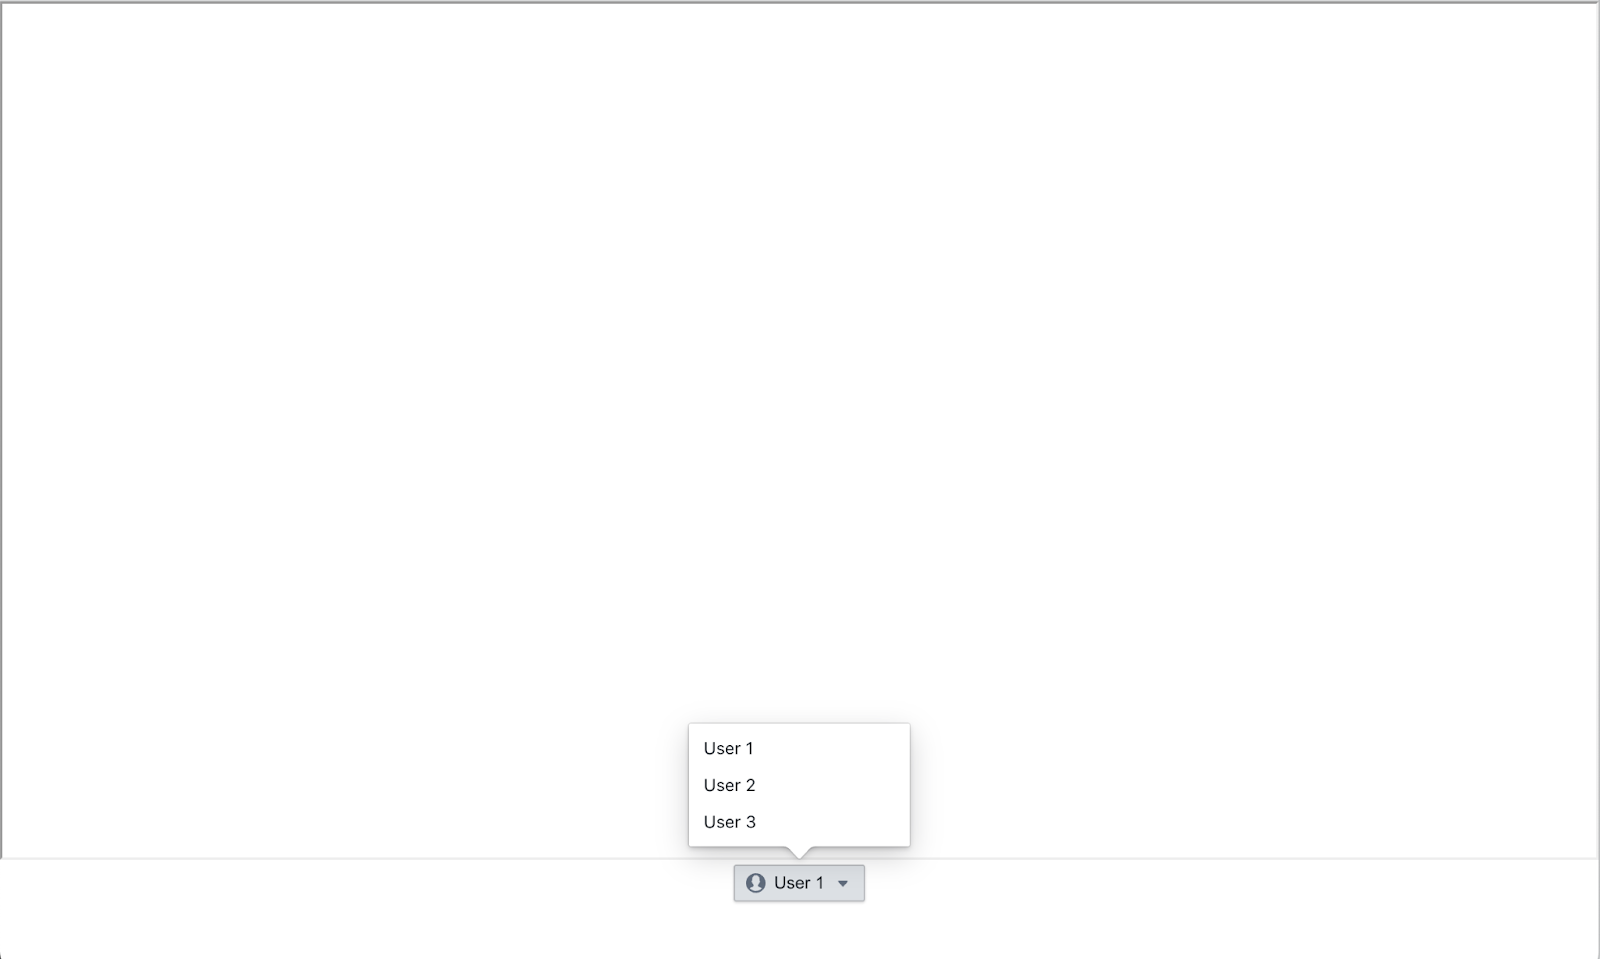
Link set up
Now that we have a placeholder for our users let’s make a link and assign some filters to our users. Restricted embed links have two configurable fields:
- linkAccessFilter: A SQL filter expression applied to the link that can be used on any data cube. The table name is always aliased as t.
- cubeAccessFilter: The ID of a data cube access filter. The data cube must have access filters configured for this type of filter to work.
For the purposes of this example we will create a restricted link on a data cube with the following access filters.
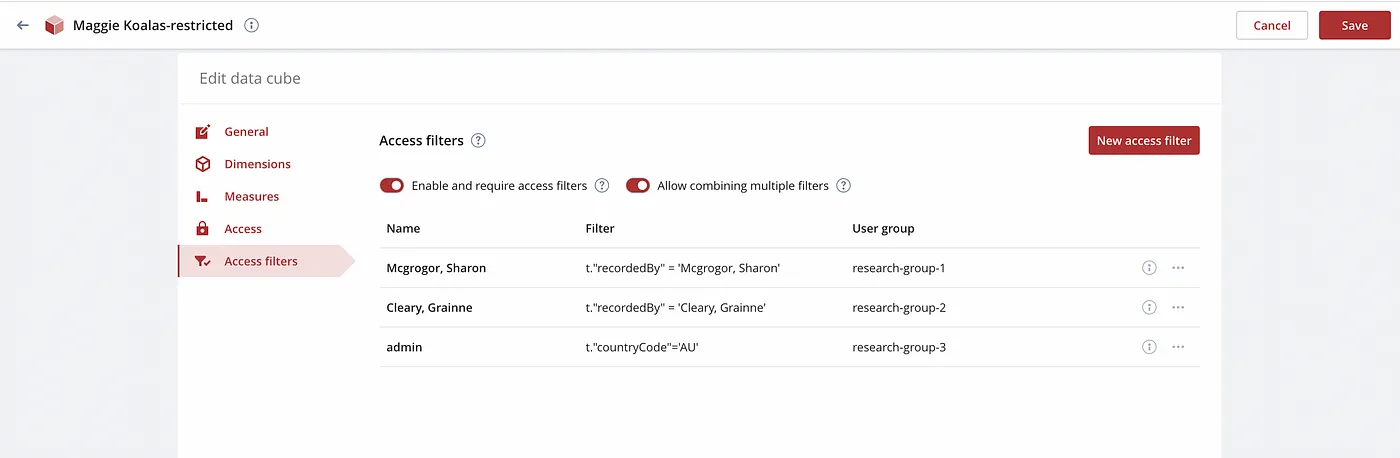
Then we can use the filter IDs to create 3 users – each with a group and a linkAccessFilter – and add them to our user list in UsersMenu.tsx. Here each user has an accessFilter ID as well as a SQL filter that will be applied to the visualization.
export const USERS = [
  // Adds the accessfilter t"recordedBy"='Mcgrogor, Sharon'
  {
    userName: "User 1",
    cubeAccessFilter: "85639959-dd28-467b-830c-04a2aa411dea",
    linkAccessFilter: undefined,
  },

  // Adds the accessfilter t"recordedBy"='Cleary, Grainne'
  // and a Sql filter on the year 2013
  {
    userName: "User 2",
    cubeAccessFilter: "05f828b4-87d3-43af-befd-297c10124d1c",
    linkAccessFilter: `t."year"='2013'`,
  },

  // Adds the accessfilter t"countryCode"='AU'
  // and a Sql filter on the province Victoria
  {
    userName: "User 3",
    cubeAccessFilter: "16b02481-3667-4be8-88e0-9de16dd1f971",
    linkAccessFilter: `t."stateProvince"='Victoria'`,
  },
];
The back end
Now using the link we just generated let’s make an endpoint to sign it!
First let’s start by creating a basic Express server in a source file named server.ts. Here is some boilerplate to get you started. You will need to install express and cors to allow the localhost sites to talk to each other. We will also install ts-node to avoid a TypeScript compilation step.
npm install --save express cors @types/express @types/cors
npm install --save-dev ts-node
src/server.ts
import express from "express";
import cors from "cors";

const PORT: number = 3001;

const app = express();

// Will allow your react app running on localhost:3000 to access the api
app.use(
  cors({
    origin: ["http://localhost:3000"],
  }),
);

app.listen(PORT, (): void => {
  console.log("Server is listening on port", PORT);
});
Now run the server using ts-node:
npx ts-node -O '{"module":"commonjs"}' src/server.tsNow for the good stuff. In a new source file called routes/embed.ts let’s create a new router that signs the link based on the user’s filters.
Creating the link requires 3 steps
1. Import the key: using the key provided when you created the embed link in Polaris, import the key using the crypto library from node. The key uses an ESCDA algorithm with a p-256 curve.
const KEY = 'your link secret key';
const LINK = 'your link URL';

const privateKey = await crypto.subtle.importKey(
  "pkcs8",
  Buffer.from(KEY, "base64"),
  { name: "ECDSA", namedCurve: "P-256" },
  true,
  ["sign"],
);
2. Sign the payload: Next we can use the key we just created and the user that will be supplied to generate a signature using the crypto library. Even if they are undefined, we need to sign a payload composed of the cubeAccessFilter, the linkAccessFilter and the current date. The order is also important: cubeAccessFilter, linkAccessFilter, then created.
const { linkAccessFilter, cubeAccessFilter} = request.body;
const date = Date.now().toString();

const data = Buffer.from(
  JSON.stringify({
    cubeAccessFilter: cubeAccessFilter,
    linkAccessFilter: linkAccessFilter,
    created: date,
  }),
  "utf8",
);

const signature = await crypto.subtle.sign(
  { name: "ECDSA", hash: { name: "SHA-256" } },
  privateKey,
  data,
);
3. Create the link: Lastly we need to compose the actual link. To do so we attach the signature as a base64 string and linkAccessFilter, cubeAccessFilter and date as URL parameters to the original link provided by Polaris. URLSearchParams may be helpful here.
const searchParams = new URLSearchParams();

searchParams.append("signature", Buffer.from(signature).toString("base64"));
if (cubeAccessFilter) {
  searchParams.append("cubeAccessFilter", cubeAccessFilter);
}
if (linkAccessFilter) {
  searchParams.append("linkAccessFilter", linkAccessFilter);
}
searchParams.append("created", date);
const signedLink = link + "?" + searchParams.toString();
In the end we should have a router that looks like this:
src/routes/embed.ts
import { Router } from "express";
import { Buffer } from "buffer";
import { webcrypto as crypto } from "crypto";

const embed = Router();

const KEY =
  "MIGHAgEAMBMGByqGSM49AgEGCCqGSM49AwEHBG0wawIBAQQgILWKf2C2j1rb4V9nN3XcigPYLsHaB3y6q0sgTBy6uAqhRANCAAQw3wSbBK9qODGZGEskBoBAf6HNMVXx6eZayDIBkPzqFzusMMccW1WiPxd1mTWnULP3GQFa/HJ7cio2kDHV2irV";

const LINK =
  "https://imply.app.imply.io/e/us-east-1+60b601fa-1eff-4eb0-ba32-65771bf0f527+7319fe2ad838f94327";

embed.post("/", async (request, response) => {
  const { cubeAccessFilter, linkAccessFilter } = request.body;
  const url = new URL(LINK);

  const privateKey = await crypto.subtle.importKey(
    "pkcs8",
    Buffer.from(KEY, "base64"),
    { name: "ECDSA", namedCurve: "P-256" },
    true,
    ["sign"],
  );

  const date = Date.now().toString();
  const data = Buffer.from(
    JSON.stringify({
      cubeAccessFilter: cubeAccessFilter,
      linkAccessFilter: linkAccessFilter,
      created: date,
    }),
    "utf8",
  );
  const signature = await crypto.subtle.sign(
    { name: "ECDSA", hash: { name: "SHA-256" } },
    privateKey,
    data,
  );

  const searchParams = new URLSearchParams();
  searchParams.append("signature", Buffer.from(signature).toString("base64"));
  if (cubeAccessFilter) {
    searchParams.append("cubeAccessFilter", cubeAccessFilter);
  }
  if (linkAccessFilter) {
    searchParams.append("linkAccessFilter", linkAccessFilter);
  }
  searchParams.append("created", date);

  url.search = searchParams.toString();

  response.status(200).send({ signedLink: url.toString() });
});

export default embed;
The front end
Now for our final step let’s create a hook in order to fetch the link for the appropriate user. In a new file called getSignedLink.ts let’s create a function that makes a POST request to localhost:3000/embed with the user filters in the body. If the call is successful we can render the signed link in our iframe.
src/getSignedLink.ts
const EMBED_API_URL = "http://localhost:3001/embed";

export async function getSignedLink(
  cubeAccessFilter?: string,
  linkAccessFilter?: string,
): Promise<string> {
  const response = await fetch(EMBED_API_URL, {
    method: "POST",
    headers: {
      "Content-Type": "application/json",
      // Add any other headers if needed
    },
    body: JSON.stringify({ cubeAccessFilter, linkAccessFilter }),
  });
  if (!response.ok) {
    throw new Error(`Response not ok: ${response.status}`);
  }
  const data = await response.json();
  return data.signedLink;
}
We can call this function from a useEffect in App.tsx that will fetch a new URL whenever the user changes or “logs in”.
App.tsx
import "./App.css";
import { useEffect, useState } from "react";
import { getSignedLink } from "./getSignedLink";
import UsersMenu, { User, USERS } from "./UsersMenu";

function App() {
  const [link, setLink] = useState("");
  const [userId, setUserId] = useState(0);

  useEffect(() => {
    async function generateLink() {
      const user: User = USERS[userId];
      try {
        setLink(
          await getSignedLink(user.cubeAccessFilter, user.linkAccessFilter),
        );
      } catch (error) {
        console.error("Error generating signed link:", error);
      }
    }
    generateLink();
  }, [userId]);

  return (
    <div className="App">
      <iframe
        width="100%"
        height={700}
        src={link}
        title="Embedded visualization"
      />
      <div>
        <UsersMenu onUserIdChange={setUserId} userId={userId} />
      </div>
    </div>
  );
}

export default App; Architecture
 Deployment
 Ingestion
 Modeling
 Operations
 Development


