Overview
Imply Polaris is often referred to as the “easy button” for Apache Druid because it simplifies and streamlines the deployment, management, and utilization of Apache Druid. In this blog, we will cover how to use Imply Polaris to efficiently access data and convert it into meaningful insights.
Imply Polaris is a cloud-native DBaaS that simplifies the development, deployment, and management of real-time analytical applications. It is built on the foundation of Apache Druid, a high-performance, column-oriented, distributed data store designed for real-time analytics. Imply Polaris extends the capabilities of Apache Druid, making it easier to deploy, scale, and manage.
As a cloud-native, fully managed service, Imply Polaris offers several benefits over self-managed Apache Druid, including:
Reduced operational overhead: With Imply Polaris, you don’t need to worry about managing your own infrastructure or maintaining your Druid clusters. This can save you a significant amount of time and resources that would otherwise be spent on infrastructure management.
Elastic scaling: Imply Polaris offers elastic scaling that allows you to quickly and easily add or remove resources to meet changing demands. This can help you to reduce costs by scaling up or down as needed, without overprovisioning resources.
Easy data ingestion: Imply Polaris offers an intuitive, web-based UI for data ingestion that allows you to easily configure data sources and utilize pipelines. This can help you to quickly ingest and process large amounts of data, without needing to write custom scripts or code.
Advanced monitoring and alerting: Imply Polaris provides advanced monitoring and alerting features that allow you to track key metrics and receive notifications when anomalies occur. This can help you to identify issues and take corrective action before they impact your business.
Improved security: Imply Polaris includes advanced security features such as data encryption, access controls, and auditing. This can help you to secure your data and comply with regulatory requirements.
These benefits can enable users to dedicate their efforts toward data analysis and data-driven decision-making and other value-adding activities, without the need to focus on infrastructure management.
Imply Account Setup
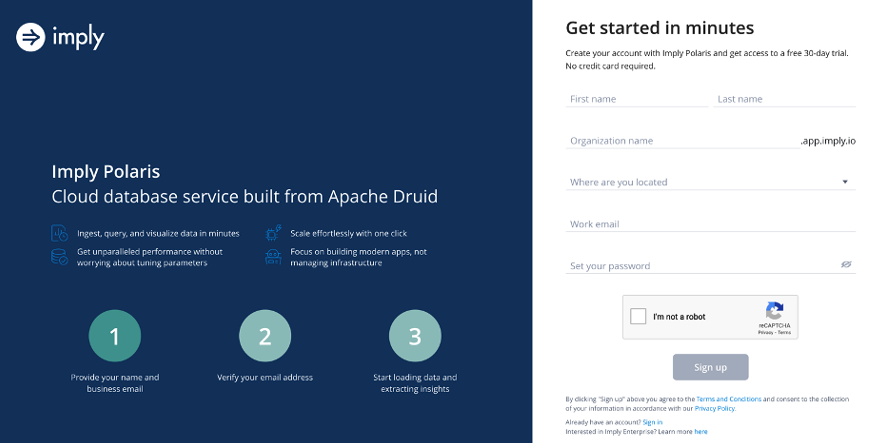
The first step is to visit the Imply Polaris website at imply.io. Once you’re there, click on the “Try Polaris for Free” button.
You will be taken to the sign-up page where you will be prompted to enter your email address and choose a password. Once you have filled in these details, click on the “Sign Up” button. See the screenshot below:
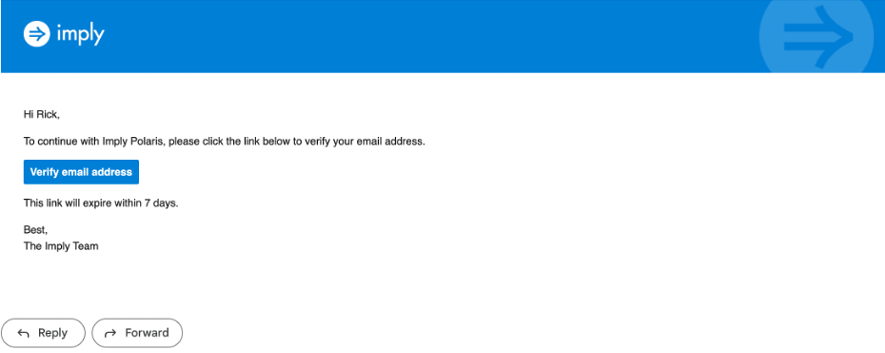
Imply Polaris will send you a verification email to confirm your account. Check your email inbox and click on the verification link to proceed. The email will be similar to the screenshot below.
Once you have verified your account, you will be asked to select a region and then select create. This will take a few minutes.
Then you will be taken to the Imply Polaris dashboard (see the screenshot below).
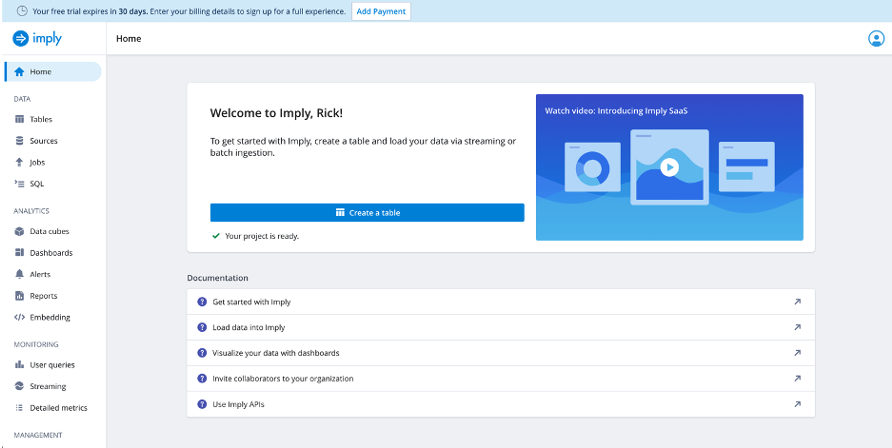
Here, you can start exploring the platform, setting up your data sources, creating jobs etc. Let’s first create a data source.
Create Data Source
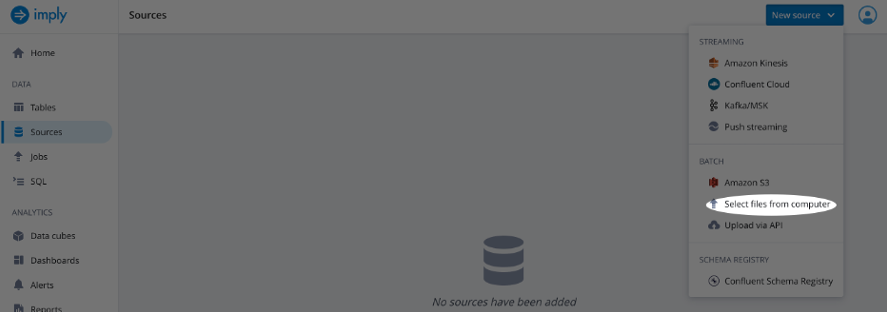
From the Imply UI select Sources
Select New source
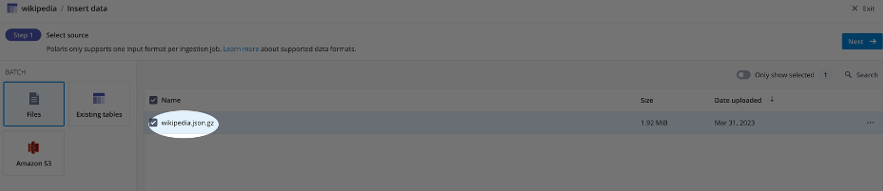
Choose Select files from computer (see screenshot below)
For this exercise I choose the wikipedia.json.gz dataset which represents Wikipedia page edits for a given day can be downloaded here:
Browse to the location of the file on your system and select Open.
Now that we have created a data source, let’s create a table to store that data.
Create Table
From the Imply UI select Tables
Select Create table and name the table wikipedia
Select Create
Now let’s load data.
Load Data
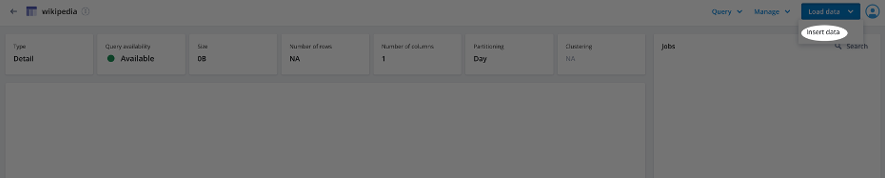
Select Load data and Insert data (see screenshot below).
Select the source by choosing Files and selecting the file we added as a data source earlier (see screenshot below).
Select Next
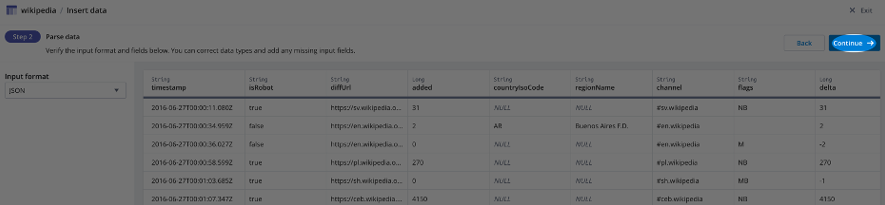
Choose JSON as the Input format and select Continue (see screenshot below).
Select Start ingestion
Note that Polaris selects the timestamp field automatically in this example. Timestamps are essential for several reasons including:
- Time-based indexing: When data is ingested into Polaris, it is typically organized into segments based on a timestamp field, via rollups. These segments are then partitioned and indexed based on time, which allows for fast and efficient querying of the data based on when it was recorded.
- Time-based queries: In order to make meaningful queries on time-series data, it’s essential to have a timestamp field that provides context about when the data was recorded. With a timestamp field, you can perform time-based queries that help you identify patterns and trends in your data over time. For example, you can filter data based on a specific time range or aggregate data based on time intervals (e.g., hourly, daily, or weekly).
- Time-based calculations: A timestamp field can also be used to perform time-based calculations and aggregations. For example, you can calculate the average, sum, or count of other fields within each time interval. This can help you identify trends and patterns in your data, and can be particularly useful when creating visualizations or reports that highlight these trends.
Once the job is completed, the UI will show a sample of the ingested data (see screenshot below).

Now that we have uploaded data, let’s run some queries.
Querying Data
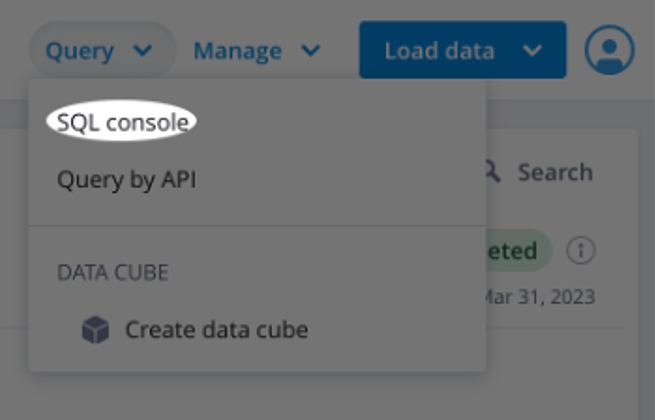
After loading data, select Query from the header and choose SQL console (see screenshot below).
Query 1
The query below will group the data by the hour of the timestamp in the __time column, and count the number of records in each group which represents the edits per hour. The ORDER BY clause sorts the results in ascending order based on the hour alias we created in the SELECT clause.
SELECT
DATE_TRUNC('hour', __time) AS "hour",
  COUNT(*) AS "Edits"
FROM "wikipedia"
GROUP BY 1
ORDER BY "Edits" ASC
Query 2
The query below is counting the number of edits made by each robot user in the Wikipedia dataset, and sorts the results in descending order based on the number of edits, limited by 10 to get the top 10 users.
SELECT
  "user",
  COUNT(*) AS "Count"
FROM "wikipedia"
WHERE "isRobot" = 'true'
GROUP BY 1
ORDER BY 2 DESC
LIMIT 10
Query 3
It is a best practice to filter by TIMESTAMP. Not doing so runs the risk of returning an overwhelming amount of data and poor query performance. Similar to a SELECT * with no LIMIT in a relational database.
The query below selects the __time column from the wikipedia table and rounds the timestamp down to the nearest hour using the FLOOR function. It then groups the data by hour for a specific time range between June 27th, at 2:00 PM and 5:00 PM, allowing for analysis and visualization of Wikipedia data trends over time.
SELECT FLOOR(__time to HOUR) AS HourTime, COUNT(*) AS "Edits"
FROM wikipedia WHERE "__time" BETWEEN TIMESTAMP '2016-06-27 14:00:00.000' AND TIMESTAMP '2016-06-27 16:00:00.000'
GROUP BY 1
Query 4
The query below selects the __time column from the wikipedia table and rounds the timestamp down to the nearest hour using the FLOOR function. It then groups the data by hour and user, counting the number of edits made by each human user during a specified time range between June 27th, 2016 at 2:00 PM and June 27th, 2016 at 4:00 PM. The results are sorted in descending order based on the number of edits, and limited to the top 10 users with the highest number of edits.
SELECT FLOOR(__time to HOUR) AS HourTime, "user", COUNT(*) AS "Edits"
FROM wikipedia
WHERE "__time" BETWEEN TIMESTAMP '2016-06-27 14:00:00.000' AND TIMESTAMP '2016-06-27 16:00:00.000' AND "isRobot" = 'false'
GROUP BY 1, "user"
ORDER BY "Edits" DESC
LIMIT 10
Query 5
This query calculates the average number of distinct pages edited by human users in each minute, based on data from the Wikipedia table. The subquery filters out rows where the isRobot column is ‘false’’ and groups the data by user, page, and minute, then calculates the count of distinct pages edited by each user per minute. The outer query then selects the human_user, page, __time_minute, and average num_distinct_pages_edited for each minute, human user, and page combination.
SELECT
  t.human_user,
  t.page,
  t.__time_minute,
  AVG(t.num_distinct_pages_edited) AS avg_distinct_pages_edited
FROM
(SELECT
   user AS human_user,
   page,
   DATE_TRUNC('minute', __time) AS __time_minute,
   COUNT(*) AS num_distinct_pages_edited
 FROM wikipedia
 WHERE isRobot = 'false'
 GROUP BY 1, 2, 3
 HAVING COUNT(*) >= 2) AS t
GROUP BY 1, 2, 3
Visualization in Polaris
Polaris includes a web-based data visualization tool that allows you to explore and analyze large data sets. Let’s create some visualizations by first building a cube.
Create Cube
Cubes are a representation of multi-dimensional data. They are a way to organize and analyze data across various dimensions (e.g., time, location, product, etc.) and measures (e.g., revenue, sales, etc.). Polaris leverages cubes to allow users to explore and visualize data interactively, by slicing and dicing the data along different dimensions. Users can easily drill down, filter, and pivot the data to gain insights and make data-driven decisions.
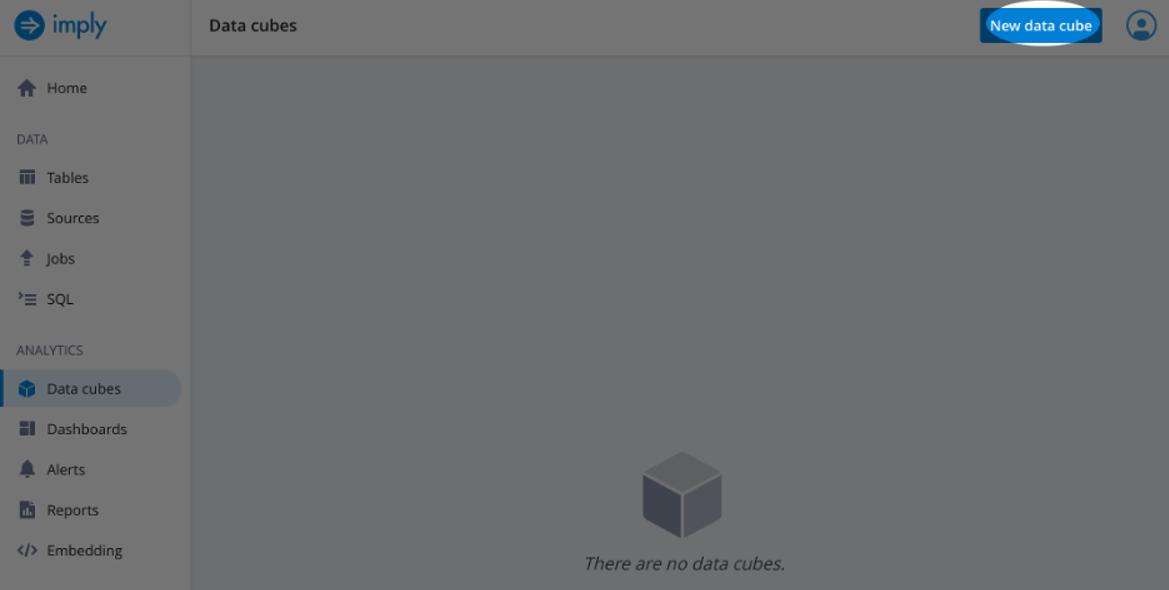
To create a cube select Data cubes under the Analytics tab on the left side of the screen and then select New data cube (see screenshot below).
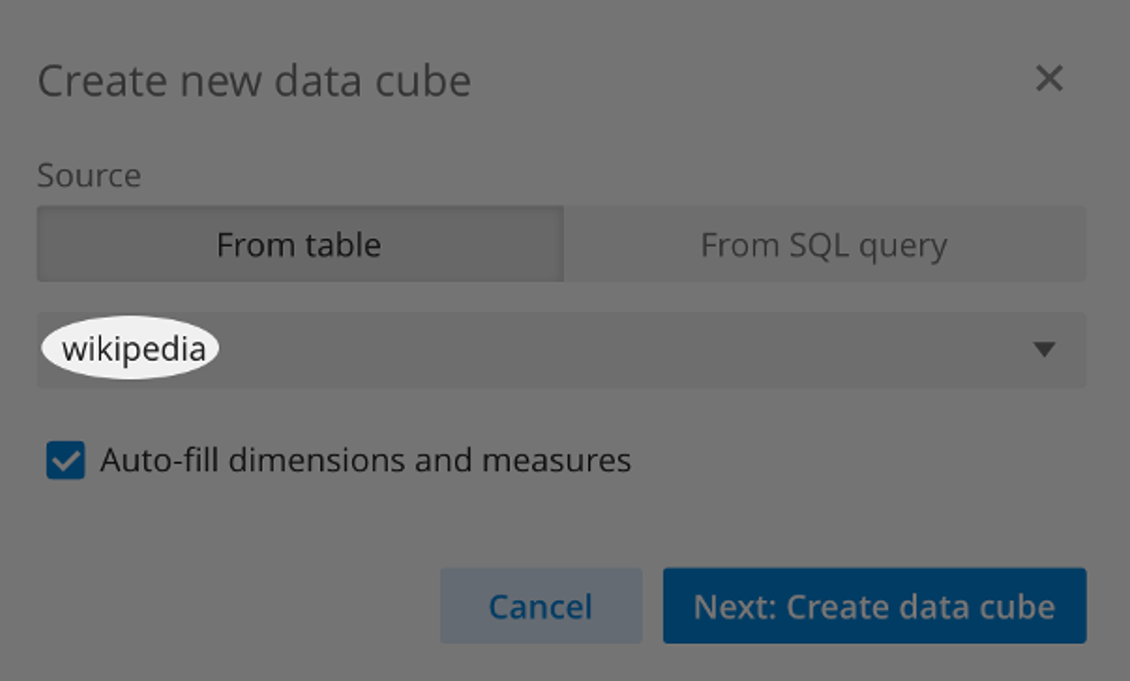
From the pop-up wizard, select Source as From Table and select the wikipedia data source we created earlier. Then select Next: Create data cube (see screenshot below).
Next, Save the cube with the selected properties.
Create Visualizations
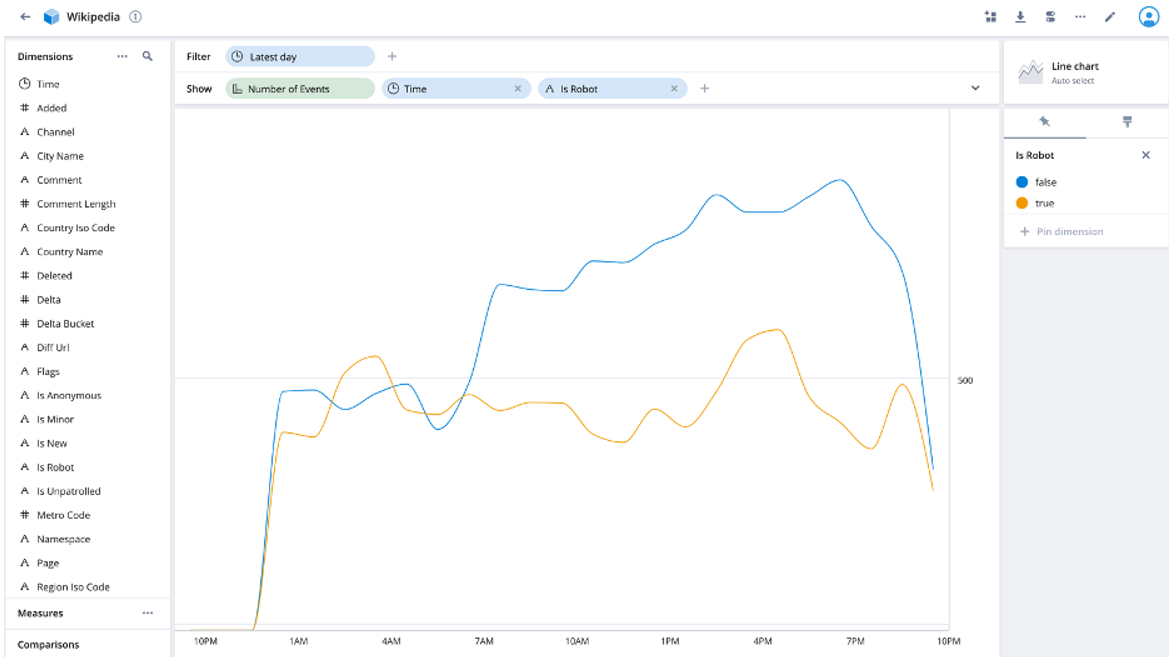
The following screen should have a preselected Filter of Latest day with Number of Events in the Show field.
In the Show row click the + button and Time and is Robot fields.
The resulting table shows number of events over time where the entries are Is Robot versus not for the latest day’s data (see screenshot below).
Now add this visualization to a dashboard using the first button on the top right of the UI (see screenshot below).

Select the + Create new dashboard option and name the dashboard example_dashboard.
Now Select the Create button.
Let’s add two more visualizations.
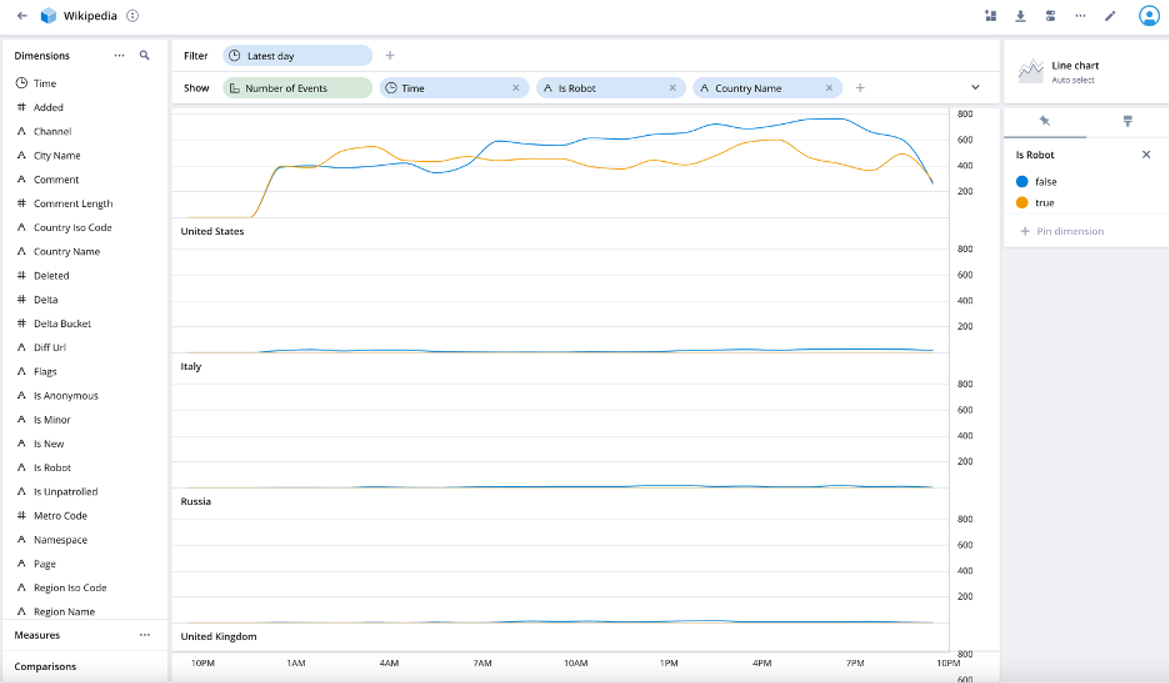
From the visualization, edit screen add Country Name. This gives us the events over time by robots compared to humans for each country (see screenshot below).
Add this visualization to the dashboard and save the updated dashboard
Finally, let’s filter for only human entries. Drag Is Robot from the Show row to the Filter row and select false (see screenshot below).
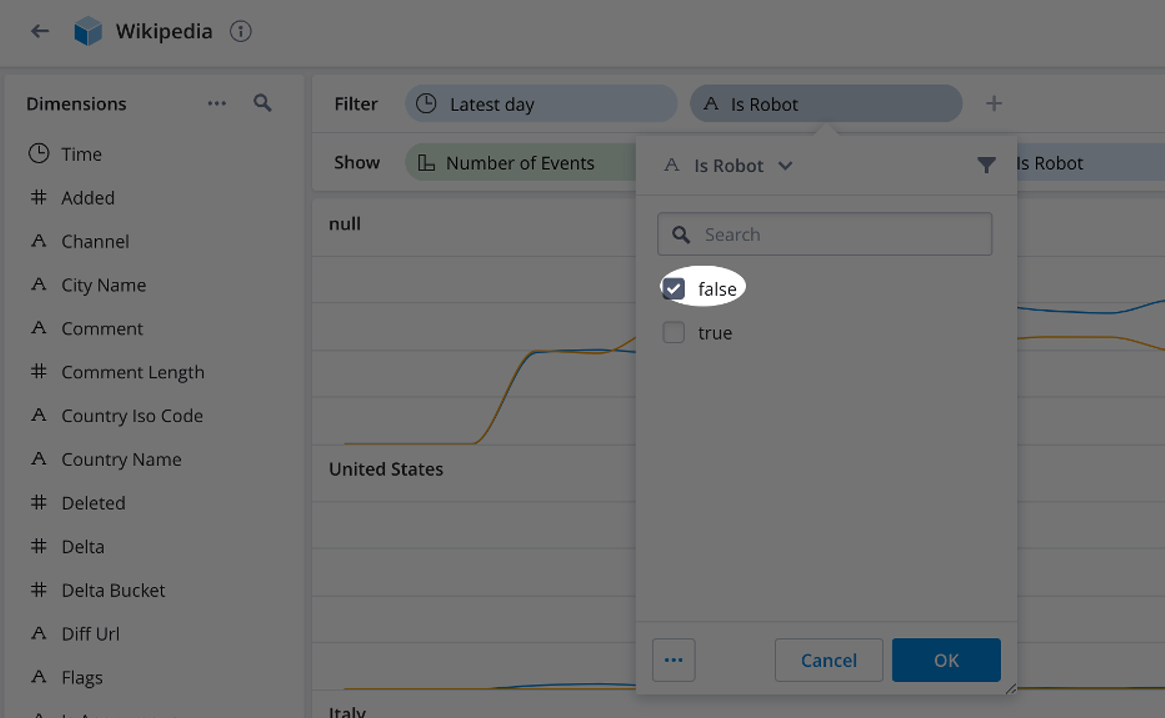
The resulting visualization shows human entries by country over a one-day time span (see screenshot below).

Add this visualization to the dashboard and save the updated dashboard.
These charts are dynamic and update when the data changes. So, if the visualization had a dynamic data source, the charts we created would update in real-time. Polaris visualizations can also be embedded into their applications which saves development time and efforts.
Summary
To summarize, Imply Polaris serves as an invaluable tool for businesses seeking to tap into the potential of real-time analytics with Apache Druid. Its easy deployment, simplified management, and powerful visualization capabilities make it an ideal solution for organizations aiming to analyze large volumes of data and extract meaningful insights. Some of the advantages of using Imply Polaris over a self-managed Apache Druid deployment are reduced operational overhead, elastic scaling, monitoring and alerting, and a visualization service. By leveraging Imply Polaris, users can implement real-time analytic solutions to help make more informed decisions and drive business success.
In this blog post, we have explored many of the capabilities of Imply Polaris. We began by setting up an Imply Polaris account and creating a data source. We then proceeded to create a table, load data and run various queries to analyze the data. Next, we delved into the data visualization capabilities that enable users to quickly explore and analyze large datasets. We created a cube, which represents multi-dimensional data, and built several visualizations to showcase the ease and flexibility of Polaris. The dynamic nature of these visualizations ensures that they automatically update as the underlying data changes, making them ideal for real-time analytics.
Stay tuned to this medium for more helpful information highlighting the features that make Imply Polaris the best database for storing, analyzing and visualizing your data.
About the Author
Rick Jacobs is a Senior Technical Product Marketing Manager at Imply. His varied background includes experience at IBM, Cloudera, and Couchbase. He has over 20 years of technology experience garnered from serving in development, consulting, data science, sales engineering, and other roles. He holds several academic degrees including an MS in Computational Science from George Mason University. When not working on technology, Rick is trying to learn Spanish and pursuing his dream of becoming a beach bum.
 Architecture
 Deployment
 Ingestion
 Modeling
 Operations
 Development


